SMALL
PoC
PoC: Proof of Concept
검증할 주요 내용에 대한 목표 설정 > 프로포 타이핑 > 배포를 통해 개념을 증명하는 것
AWS Lambda의 Node.js
미리 적어두지만 깔끔한 코드는 아니다. 이것저것 시도하면서 많이 변형되었다.
더보기
const AWS = require('aws-sdk');						//aws의 sdk를 사용

const dynamo = new AWS.DynamoDB.DocumentClient();	//aws dynamoDB와 연결

// node.js에서 내가 보낸 변수의 값은 event.변수명 으로 들어온다고 생각하면 된다.
exports.handler = async (event, context, callback) => {

    // http에서 응답받기 위해 상태코드, 헤더, 바디 변수를 정의해줬다.
    // 마지막에 한 번 더 정확성을 위해 정의해준다.

    let statusCode = '200';
    const headers = {
        'Access-Control-Allow-Origin': '*'
    };
    let body = event.httpMethod;

    let payload;
    const tablename = "serverless";			// serverless라는 dynamoDB 테이블과 연결

    try {
        switch (event.httpMethod) {			// httpMethod로 들어온 상태를 나눈다.
            case 'DELETE':					// 삭제일 경우
                 payload = {				// 삭제를 위한 node.js -> dynamoDB 형식을 맞춰준다.
                    TableName: tablename,
                        Key: {
                            "no" : event.no,	// no라는 key 값으로 서치하여 삭제
                        },
                };
                body = await dynamo.delete(payload).promise();	//aws의 dynamodb에서 delete 실행한 결과를 body에 저장한다.
                break;
            case 'GET':						// Read 기능인 get
                payload = {
                    TableName: tablename,
                        Key: {
                            "no" : event.no,	// no를 기준으로 get 한다.
                        },
                };
                body = await dynamo.scan(payload).promise();	//나머지는 성공 여부를 위해서 return 값을 저장했다면, 얘는 scan의 결과를 저장한다.
                break;
            case 'POST':					// Create의 Post
                payload = {
                    TableName: tablename,
                    Item: {
                        "no" : event.no,			// key값인 no를 기준으로 나머지 title, content 삽입
                        "title" : event.title,
                        "content" : event.content
                    },
                };
                body = await dynamo.put(payload).promise();		//실행
                break;
            case 'PUT':
                payload = {
                    TableName: tablename,
                    Key: {
                        "no" : event.no										// key값을 기준으로 search
                    },
                    UpdateExpression: "set title = :x, content = :y",		// title은 :x로, content는 :y로 업데이트
                    ExpressionAttributeValues:{
                        ":x" : event.title,							// :x, :y를 정의
                        ":y" : event.content
                    }
                };
                body = await dynamo.update(payload).promise();		// 업데이트 실행
                break;
            default:
                throw new Error(`Unsupported method "${event.httpMethod}"`);		//이 네가지 경우가 아니라면 에러를 저장한다.
        }
    } catch (err) {
        statusCode = '400';		//에러 코드
        body = err.message;		//에러 메시지 저장
    } finally {
        body = JSON.stringify(body);		//JSON 파일로 변환해서 http에 전달해주어야 한다.
    }

	// 세 개중 하나라도 제대로 되어있지 않으면 에러에 맞부딪칠 수 있다.
    return {
        statusCode,
        body: body,
        headers,
    };
};
추가적으로 AWS dynamoDB에서 POST와 PUT은 같은 역할을 한다. 만약 기존에 Key 값이 존재하면 새로운 값들로 update를 해주고, key값이 없다면 데이터를 새롭게 넣어준다. 그렇게 바뀐 모양
화면을 나타낼 HTML 코드
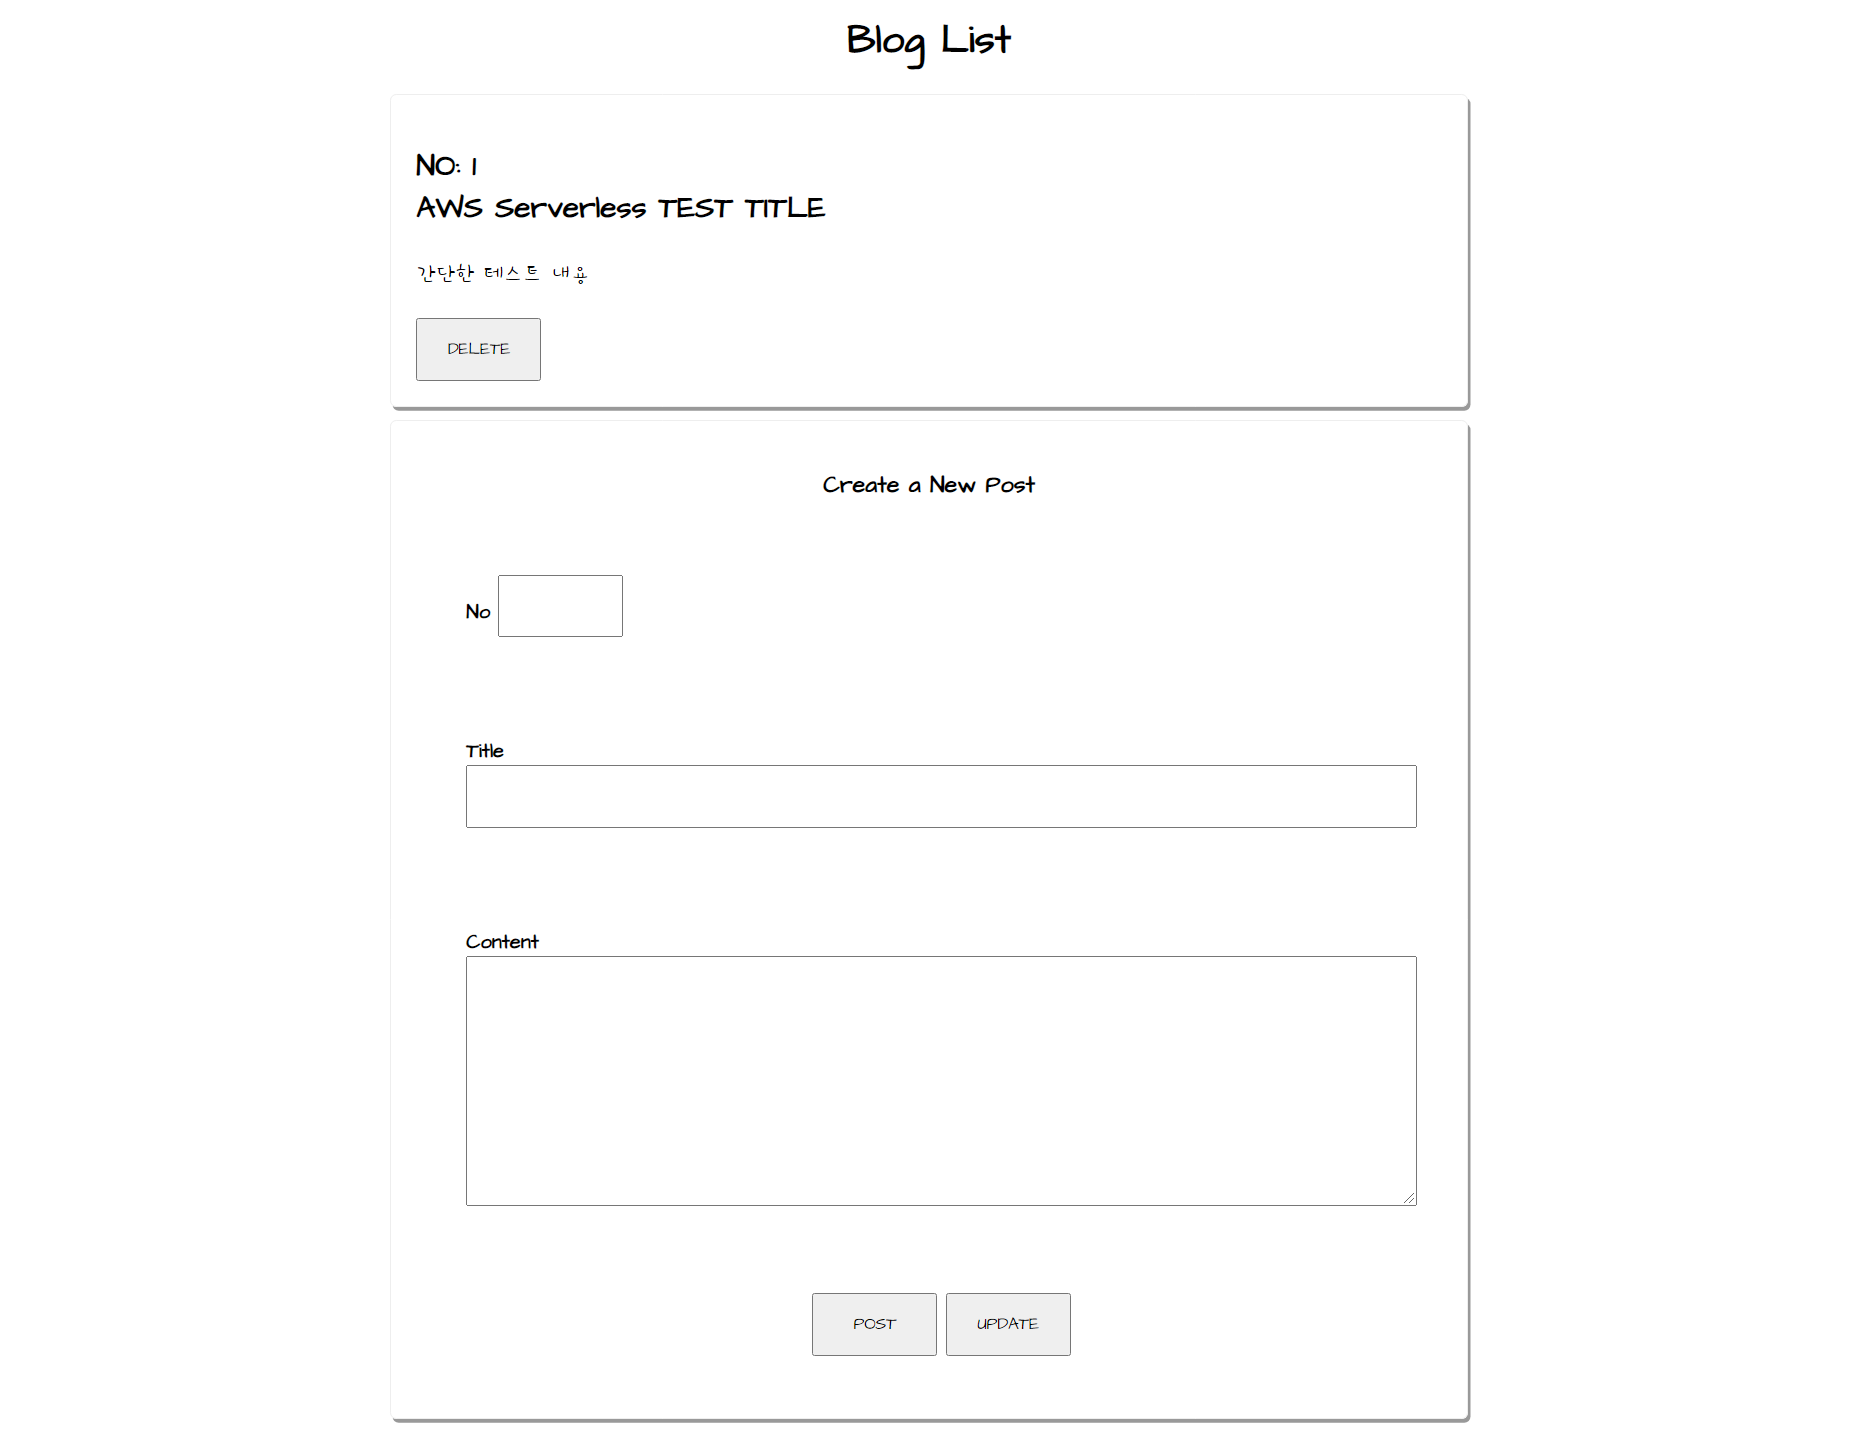
HTML 파일
- jQuery를 이용한 Ajax 통신
오로지 HTML과 간단한 JavaScript로만 통신이 가능할 수 있도록 페이지를 구성함
더보기
각각 url에는 API Gateway의 Endpoint를, X-Api-Key에는 AWS의 Access key ID를 넣어주면 된다.
<html>
<head>
<meta http-equiv="Content-Security-Policy" content="upgrade-insecure-requests;">
<title>My Blog Maker</title>
<script src="http://code.jquery.com/jquery-latest.js"></script>
</head>
<body>
<div class="App">
<div class="Blog">
<h1 class="title">Blog List</h1>
<script>
var html = "";
$.ajax({
type: "GET",
headers: {
"X-Api-Key": "AWS의 Access key를 넣으면 된다!"
},
url: 'API Gateway의 EndPoint 주소를 넣으면 된다.',
crossDomain: true,
dataType: 'json',
contentType: "application.json",
success: function (res) {
var lists = res.Items;
lists.sort(function(a, b){
return a.no - b.no;
});
console.log(lists);
for(var i in lists){
html += '<div class="FullPost">';
html += '<h2 class="postTitle">' + "NO: " + lists[i].no + "<br>" + lists[i].title + "</h2>";
html += '<div class="content">' + lists[i].content + "</div><br>";
html += '<input type="button" value="DELETE" onClick="deletee(' + lists[i].no+')" />'
html += '</div>';
}
$('#fortest').html(html);
},
error: function (res, status, error) {
console.log(error);
}
});
</script>
<div id="fortest"></div>
<div class="NewPost">
<h3 class="title">Create a New Post</h3>
<div class="form">
<div class="form-row">
<label for=postTitle>No</lable>
<input name="no" class="postTitle" id="no" style="width:60px" />
</div>
<div class="form-row">
<label for=postTitle>Title</lable>
<input name="title" class="postTitle" id="title" />
</div>
<div class="form-row">
<label for=content>Content</lable>
<textarea name="content" class="content" id="content"></textarea>
</div>
<div class="form-row">
<div style="text-align: center;">
<script>
const API_URL = 'API Gateway의 EndPoint';
function get() {
var form_data = {
no: $("#no").val(),
title: $("#title").val(),
content: $("#content").val()
}
$.ajax({
type: "GET",
headers: {
"X-Api-Key": "AWS Access Key ID"
},
url: API_URL,
crossDomain: true,
dataType: 'json',
contentType: "application.json",
success: function (res) {
$("#fortest").load(window.location.href + "#fortest");
},
error: function (res, status, error) {
console.log(error);
}
});
}
</script>
<input type="button" value="POST" onClick="post()" />
<script>
function post() {
form_data = {
httpMethod: "POST",
no: Number($("#no").val()),
title: $("#title").val(),
content: $("#content").val()
}
$.ajax({
type: "POST",
headers: {
"X-Api-Key": "AWS Access Key ID"
},
url: API_URL,
crossDomain: true,
data: JSON.stringify(form_data),
dataType: 'json',
contentType: "application.json",
success: function (res) {
window.location.reload();
},
error: function (res, status, error) {
console.log(error);
}
});
}
</script>
<input type="button" value="UPDATE"" onClick=" put()" />
<script>
function put() {
form_data = {
httpMethod: "PUT",
no: Number($("#no").val()),
title: $("#title").val(),
content: $("#content").val()
}
$.ajax({
type: "PUT",
headers: {
"X-Api-Key": "AWS Access Key ID"
},
url: API_URL,
crossDomain: true,
data: JSON.stringify(form_data),
dataType: 'json',
contentType: "application.json",
success: function (res) {
window.location.reload();
}
});
}
</script>
<script>
function deletee(number) {
form_data = {
httpMethod: "DELETE",
no: number
}
$.ajax({
type: "DELETE",
headers: {
"X-Api-Key": "AWS Access Key ID"
},
url: API_URL,
crossDomain: true,
data: JSON.stringify(form_data),
dataType: 'json',
contentType: "application.json",
success: function (res) {
window.location.reload();
}
});
}
</script>
</div>
</div>
</div>
</div>
</div>
</div>
</body>
</html>각각 url에는 API Gateway의 Endpoint를, X-Api-Key에는 AWS의 Access key ID를 넣어주면 된다.
CSS 추가
- 헤더 사이에 아래 HTML을 넣어주면 글씨체 및 CSS를 간단하게 적용할 수 있음
- Codepen.io 참고
더보기
    <link href="https://fonts.googleapis.com/css2?family=Architects+Daughter&display=swap" rel="stylesheet">
    <link href="https://fonts.googleapis.com/css2?family=Hi+Melody&display=swap" rel="stylesheet">
    <style>
        body {
            font-family: 'Architects Daughter', 'Hi Melody';
        }

        .Blog {
            margin: 10px auto;
            width: 60%;
        }

        .Blog .title {
            text-align: center;
        }

        .Posts {
            display: flex;
            margin: 10px 0;
            justify-items: center;
            justify-content: space-between;
        }

        .Post {
            border: 1px solid #ccc;
            margin: 10px 10px;
            padding: 20px;
            box-shadow: 2px 3px #999;
            border-radius: 5px;
            width: 300px;
            position: relative;
        }

        .Post .postTitle {
            text-align: left;
        }

        .Post .author {
            position: absolute;
            bottom: 0%;
            right: 0%;
            box-sizing: border-box;
            margin: 10px;
            font-style: italic;
        }

        .Post .author::before {
            content: "- "
        }

        .FullPost {
            border: 1px solid #eee;
            box-shadow: 2px 3px #999;
            margin: 10px;
            padding: 20px;
            box-sizing: border-box;
            border-radius: 5px;
        }

        .FullPost .postTitle {
            text-align: left;
        }

        .FullPost .content {
            font-size: 1.2rem;
            line-height: 1.5em;
        }

        .NewPost {
            font-family: 'Architects Daughter', 'Hi Melody';
            border: 1px solid #eee;
            box-shadow: 2px 3px #999;
            border-radius: 5px;
            margin: 10px;
            padding: 20px;
            box-sizing: border-box;
            display: flex;
            flex-direction: column;
        }

        .NewPost .title {
            text-align: center;
            width: 100%;
            box-sizing: border-box;
        }

        .NewPost .form-row {
            display: flex;
            flex-direction: column;
            margin: 10px;
            padding: 20px;
            width: 100%;
            box-sizing: border-box;
        }

        .NewPost .form-row label {
            text-align: left;
            padding: 10px;
            font-weight: bold;
            box-sizing: border-box;
            margin-bottom: 10px;
        }

        .NewPost .form-row .postTitle,
        .NewPost .form-row .content,
        .NewPost .form-row .author {
            width: 100%;
        }

        .NewPost .postTitle {
            font-family: 'Architects Daughter', 'Hi Melody';
            font-size: 2rem;
        }

        .NewPost .form-row .content {
            font-family: 'Architects Daughter', 'Hi Melody';
            min-height: 200px;
            font-size: 1.2rem;
            line-height: 1.5em;
        }

        input {
            font-family: 'Architects Daughter', 'Hi Melody';
            min-height: 50px;
            min-width: 100px;
        }
    </style>
관련 글 목록
반응형
LIST
'IT > AWS' 카테고리의 다른 글
| AWS Solutions Architect Professional 합격 후기 (7) | 2021.02.01 |
|---|---|
| AWS File System - EFS, FSx (0) | 2021.01.28 |
| Serverless with AWS Lambda (1) (0) | 2021.01.26 |
| AWS Python 연결 - Boto3 (1) | 2021.01.25 |
| AWS Storage 종류 (0) | 2021.01.20 |


